
Sugaring at home - instructions
Smooth and soft skin with home sugaring? The instructions page goes through in depth how to do sugaring at home using HejBuddy products. Please note that the instructions are brand-specific!
If this is your first time sugaring, please read the instructions before you start. Improper technique can break hairs or cause bruising.
ON THIS PAGE: WRITTEN INSTRUCTIONS | ANIMATED INSTRUCTIONS | CHECKLIST | TIPS FOR DIFFERENT AREAS
INSTRUCTIONS: SUGARING AT HOME WITH SUGAR BUDDY
SKIN PREPARATION FOR SUGARING
1. Oil-free exfoliation
Gently exfoliate your skin 24 hours before sugaring, using an oil-free exfoliant to prevent a film from forming on the skin surface. This will ensure that ingrown hairs can also rise to the surface of the skin and the sugar paste can adhere to them as well.
2. Good cleaning
Make sure the skin is completely clean and dry before sugaring. There should be no deodorant, lotion or sprays on the skin that will prevent the paste from sticking.
3. Efficient drying
If there is moisture or sweat on the skin, the sugar paste will not be able to properly adhere to the hair. One of the ingredients of sugar paste is water, so the paste will try to blend into the skin if there is moisture in it.
4. TIP: Use a fan
‼️ A traditional fan is a good tool in the summer - it cools and dries the entire body, not just the area to be sugared.
STARTING SUGARING
5. Paste of suitable temperature
Sugar Buddy sugaring paste also works straight from the jar at room temperature, but if necessary, you can warm it in a water bath or microwave. Do not overheat the paste!
When is it good to warm the paste? The paste is more pleasant when it is slightly softer (not runny) so it spreads better.
♨️ Microwave heating: Put the jar lid and intermediate lid aside, and transfer the entire jar to the microwave without the lid. Heat the full jar for 5 seconds at a time, but no more than 10 seconds. Check the consistency of the mass.
♨️ Heating in a water bath: Put hot water in a small bowl or saucepan and place the entire Sugar Buddy jar with the lid in the water bath so that the hot water is about halfway up the jar and let it brew for about 15 minutes. Do not let any water get into the jar!
6. Taking the pulp from the jar
To practice, take a small (strawberry-sized) dollop of fondant directly from the jar with a spatula, and then roll it around until the fondant breaks.
The best way to learn the right amount of mass is to do it yourself! You can always add more mass by scooping it up with a clean, dry spatula.
The smaller the area to be sugared, the smaller the amount of pulp needed to avoid waste.
However, it is good to remember that a smaller amount of grapes can easily be used to make a good result.
7. Sugaring: spreading and working the sugar paste
Now you have the mass on the tip of the spatula and the spatula in your hand. With your free hand, hold the skin in place to provide a firm surface for the sugaring and to prevent the skin from moving.
At this point, note that you always start applying against the grain, not back and forth.
Use a spatula to gently slide the soft sugar paste onto the area to be sugared, against the grain. You can apply the paste as far as it glides smoothly. When you are done with the first application, remove the spatula from the skin like an airplane, i.e. not at a 90° angle straight up, but at an angle of about 45° diagonally up.
Work the sugar paste over the same area 3-5 times, meaning after each application, go back to the beginning and apply it again to the same area. This ensures that the sugar paste sticks to every little hair.
8. Sugaring: separating and removing the sugar mass
Continue to hold the skin taut with your other hand.
Now, for the final application, apply the paste over the paste that has already been applied, press firmly against the skin, and then pull the paste off in the direction of hair growth, parallel to the skin. Pulling upwards can cause bruising.
You don't have to remove the compound in one go, but if you have applied it to a larger area, you can also remove it in sections. Remember to go over the compound that has already been applied before each removal.
STOPPING SUGARING
9. Hairless and ready?
Once the desired areas have been covered, wipe the area with water if necessary and spray with the soothing Buddylicious Body Mist to reduce redness and effectively moisturize the skin without clogging it.
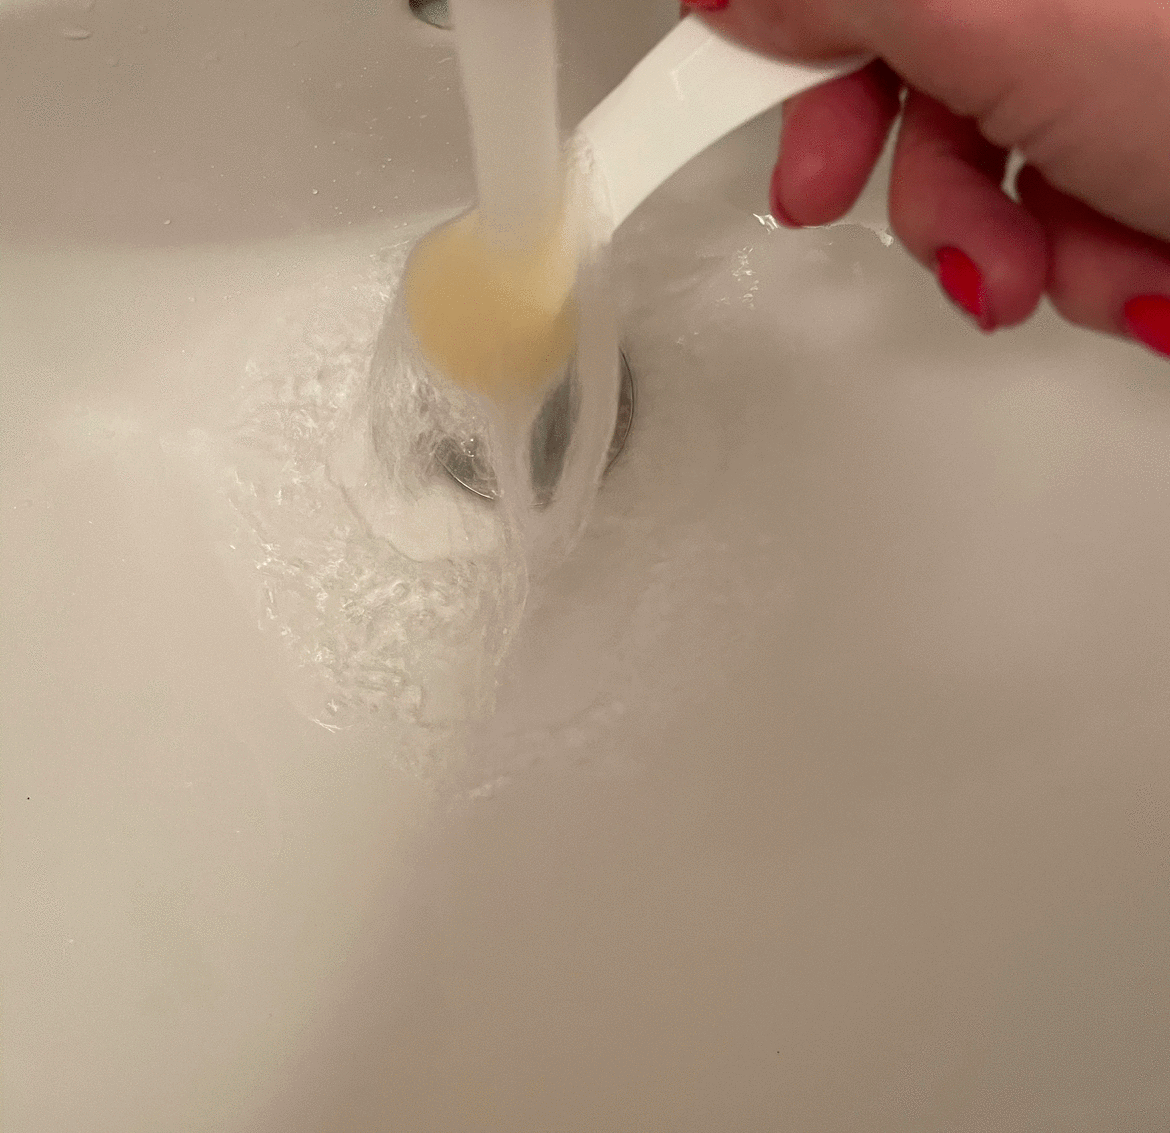
10. Cleaning the spatula
Clean the spatula for the next use: Whether you are using the flexible spatula from the starter kit or the sturdy ergonomic Eco spatula
Quickly run the child under cold water to solidify the sugar paste.
Push the solidified sugar mass off the spatula with your fingers and throw it in the bio-waste.
Finally, rinse the sugaring spatula under hot water to melt the sugar and dry the spatula for the next use.
The spatula should be completely dry and clean when it reaches the sugar jar.
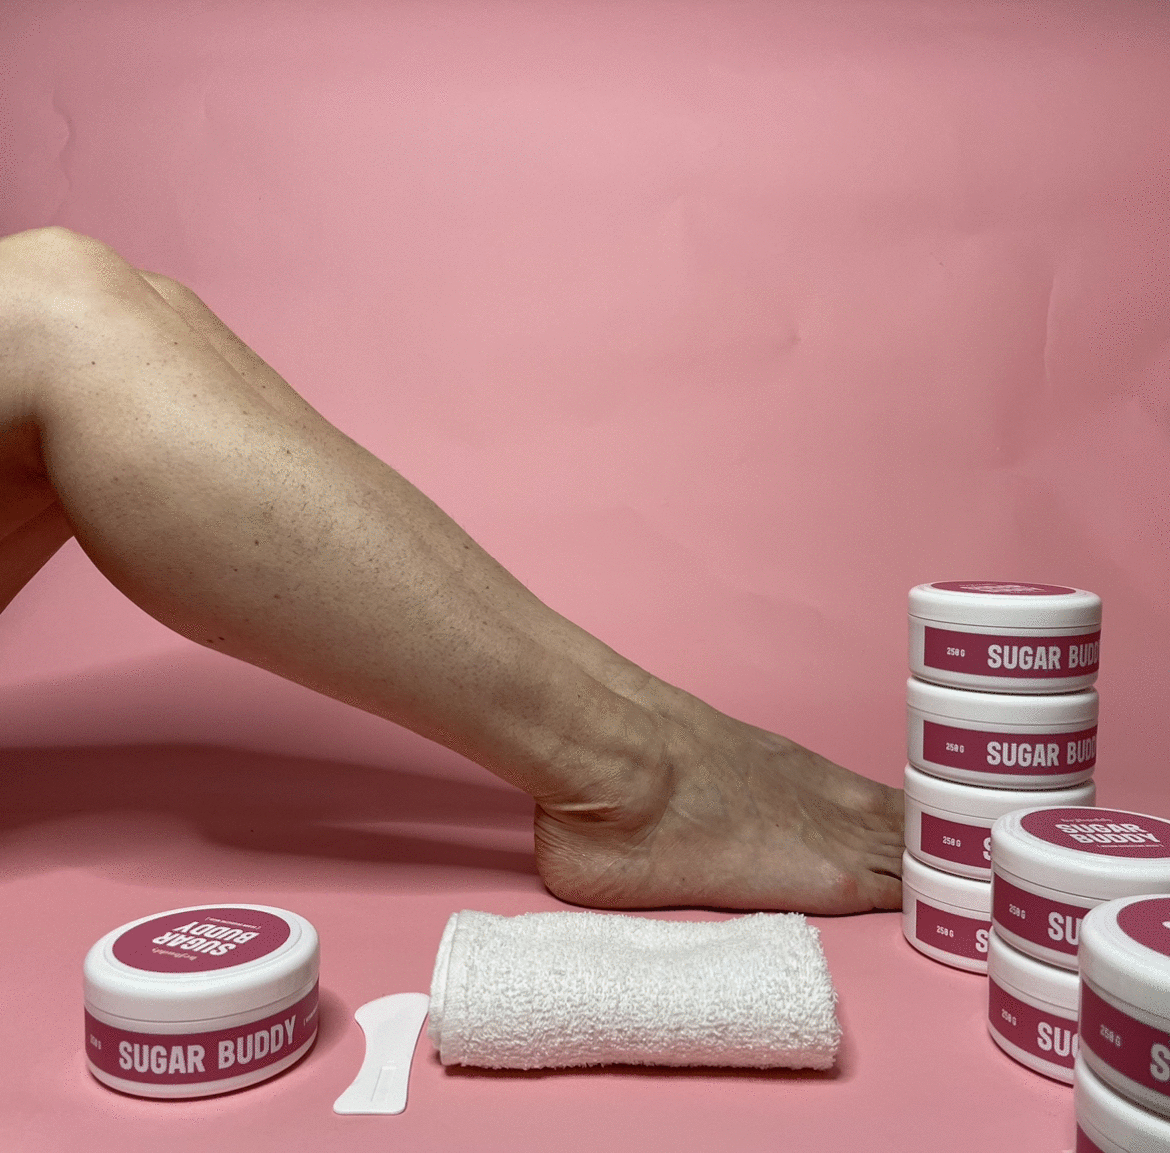
PICTURED INSTRUCTIONS FOR SUGARING:
Buy Sugar Buddy-
1. Clean & dry
Cleanse your skin of creams and dirt with an oil-free cleanser.
Dry thoroughly. No moisture should remain on the skin.
-
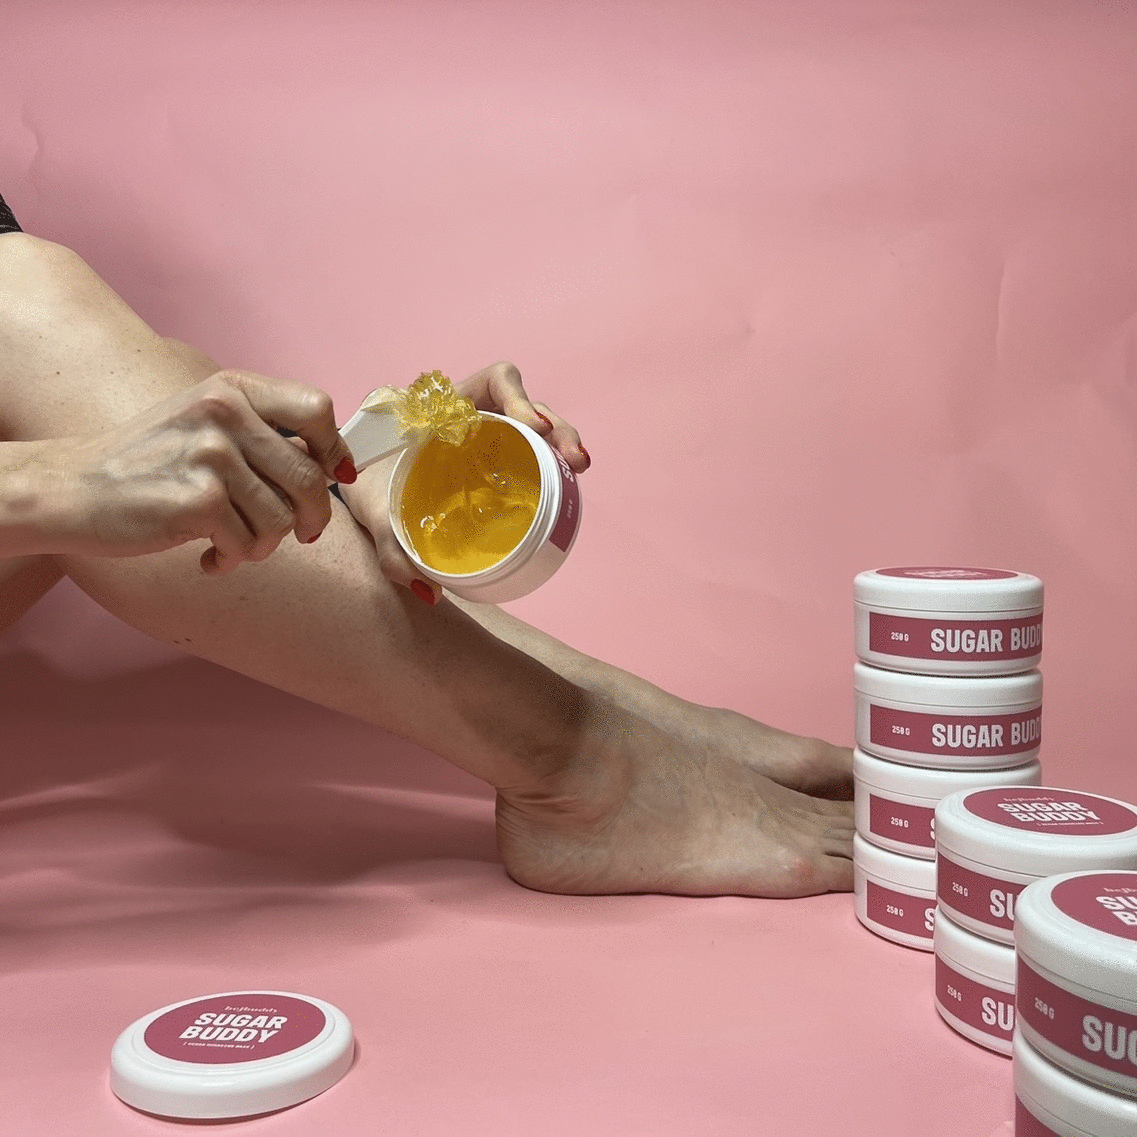
2. Spread & Slide
Slide soft fondant Use a spatula to apply the sugaring to the area against the hair. Use enough weight, you will see the hairs fold with the paste.
-
3. Work the area
Work the sugar paste over the area 3-5 times calmly. While working, always treat the same area. For tight hairs, you can use a zig-zag motion.
-
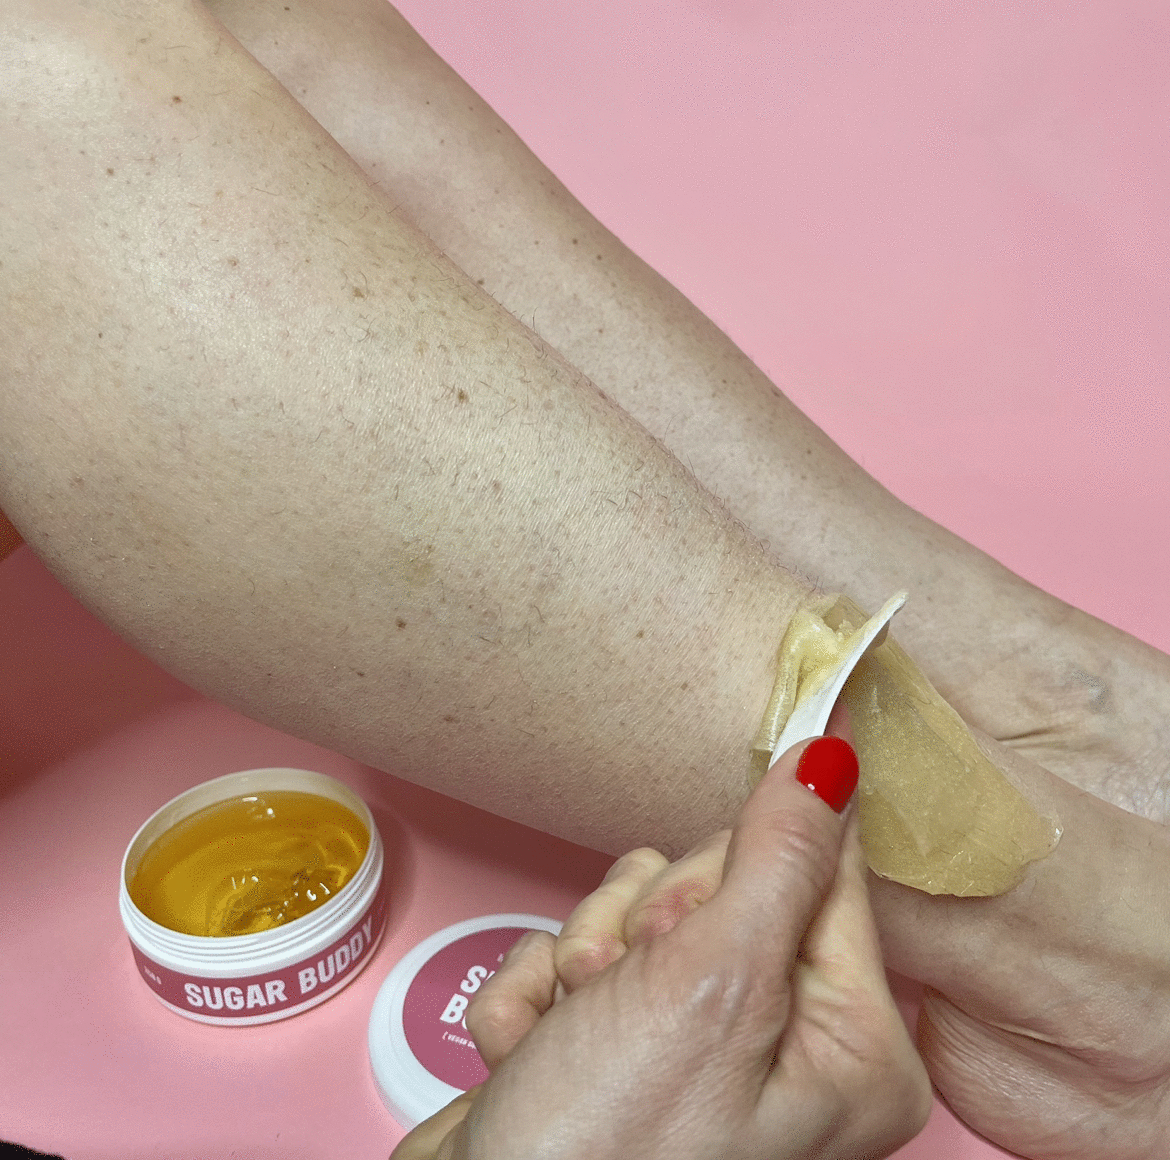
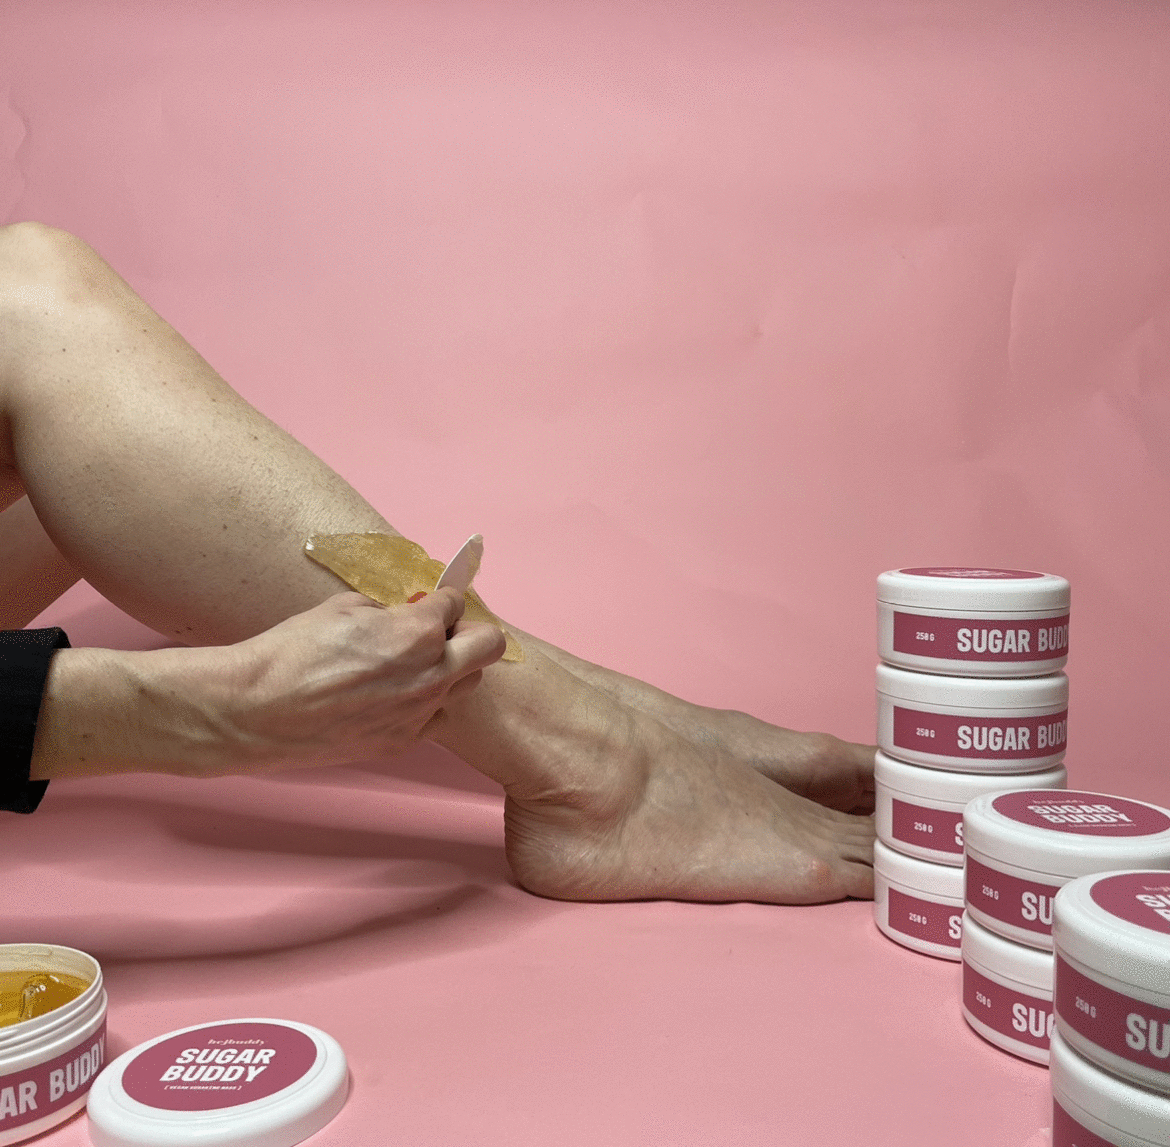
4. A sharp jerk
It's time to remove the paste and the hair! Apply the paste over the already applied paste, press the spatula into the skin and then pull it firmly in the other direction, parallel to the skin.
🚫 If you pull the mass from the middle, the edges will not "go with it."
🚫 If you pull straight up, the mass will not move and you will cause a bruise.
-
5. Repeat & delete
Repeat steps 2-4 for the next area, either on the same body part or on a completely new area.
Please note that the mass is used in different amounts for different areas. A coin-sized mass is enough for the armpits, a golf ball-sized mass for the lower legs.
If the mass gets stuck / melts on the skin (you have worked so much that the skin is really warm, there is too little mass or water has gotten into it, for example), you can rinse it off with warm water.
-
6. Prepare!
Tips for cleaning the spatula:
• Run the child briskly under cold water to solidify the sugar paste.
• Push the sugar paste off the spatula with your fingers and throw it in the organic waste
• Finally, rinse the pad under hot water and dry for next use.


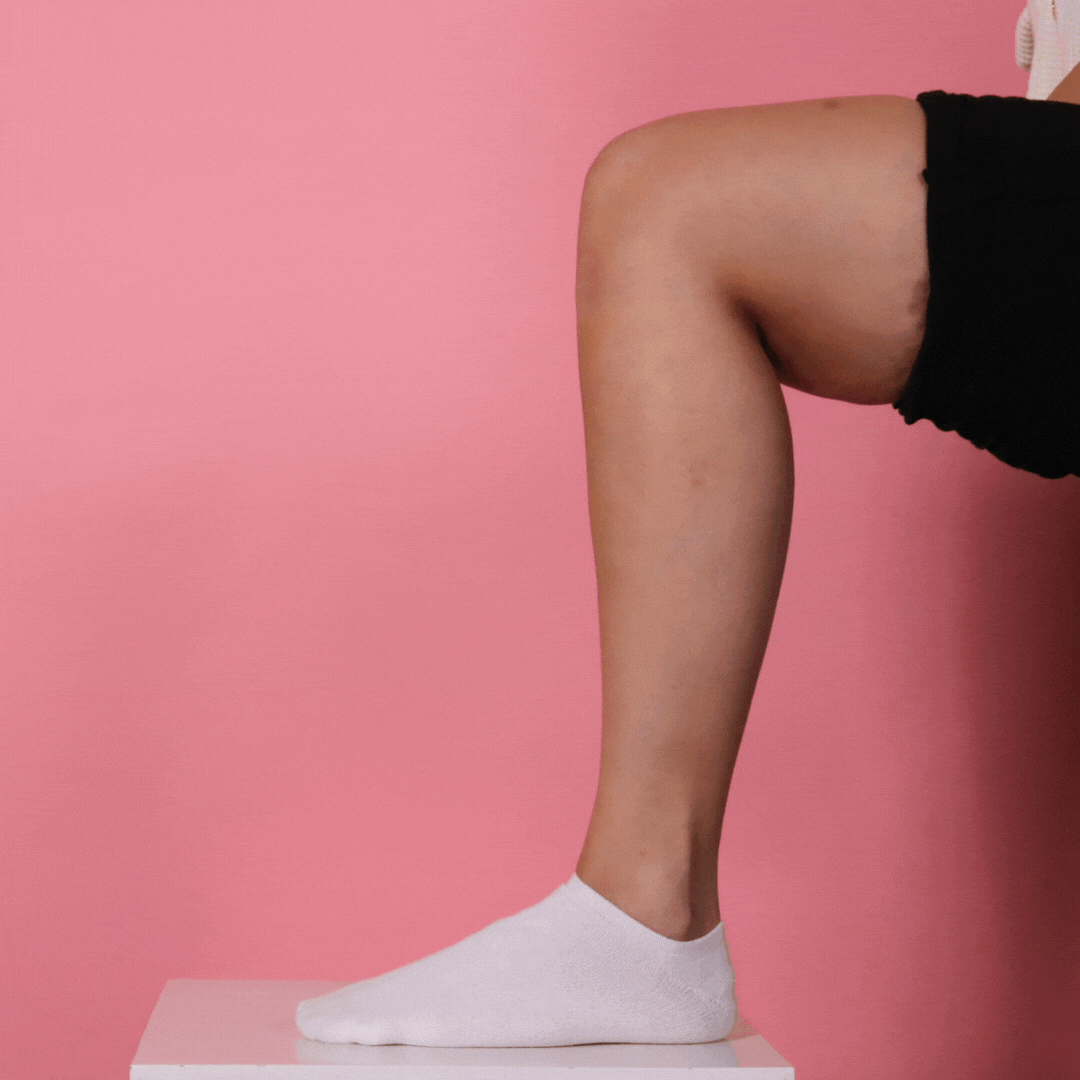
Smooth legs
When sugaring large areas, remember the following:
1. You can spread the paste over as large or as small an area as you like
2. You can add more mass if you feel you need more - always add with a clean spatula.
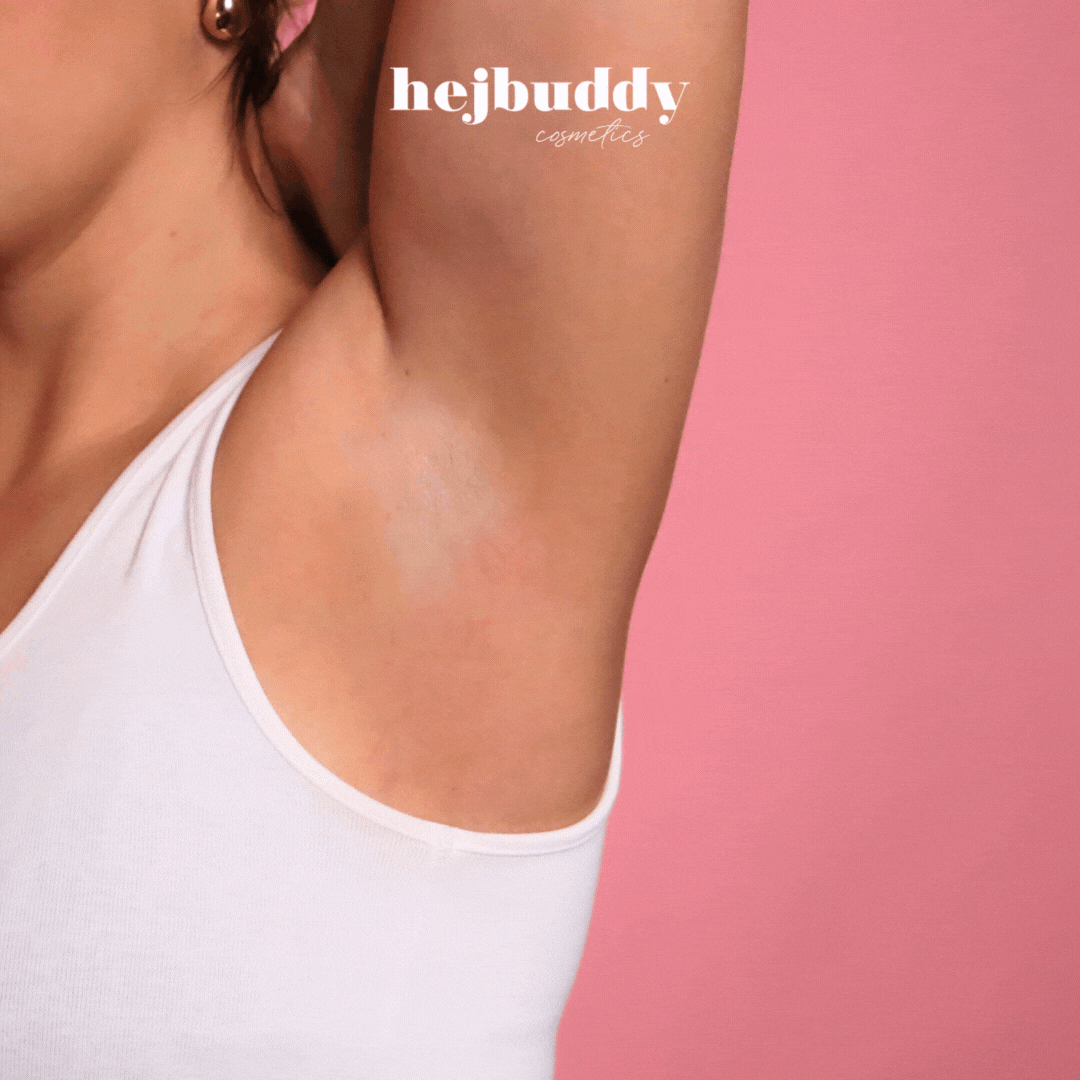
Armpits tight
When sugaring your armpits, remember these things:
1. Stand in front of a mirror in good light
2. Raise your arm so that the skin under your armpit tightens
3. Hair grows in 2-4 different directions in the armpit, so take this into account when sugaring.
4. Small area at a time to avoid bruising and broken hairs
CHECKLIST FOR SUGARING AT HOME:
HejBuddy® Sugaring + Skincare
TIPS FOR SUGARING DIFFERENT AREAS:
Legs: Lower legs + thighs [easiest]
• It is best to sugar the ankle while it is extended, so that the skin is taut.
• It is best to sugar the knee while it is bent, so that the skin is taut.
• Calves can be easily worked by lifting the leg onto your lap or standing, squatting slightly and leaning back.
Arms: Hands + upper arms
• The support grip on the skin of the arms is more challenging than on the legs, for example. You can ask a friend to tighten the skin.
• Growth directions are often diagonal or transverse in the arms
Armpits
• Skin tightening. Place your hand over your neck well towards your shoulder blade, causing the skin in your armpit to naturally tighten.
• Do the armpits in small sections. Hair usually grows in two different directions - don't apply the paste to the entire armpit at once.
Face: upper lip + cheeks + chin
• Small areas at a time
• Good support grip
• Very quiet application
Bikini area or Brazilian [most challenging]
• Support grips + small areas!
• Always proceed from the outer edge inwards, and from top to bottom > So, from the groin towards the pubic mound, always deepening the line one section at a time
• Pay attention to the direction of hair growth; usually diagonally from both edges towards the center and in the middle the growth direction is straight down.